Application of a traction splint is described with slight variations across sources depending on the specific model (for example, the bipolar Hare splint or unipolar Sager splint), but in general the process involves the following basic steps:
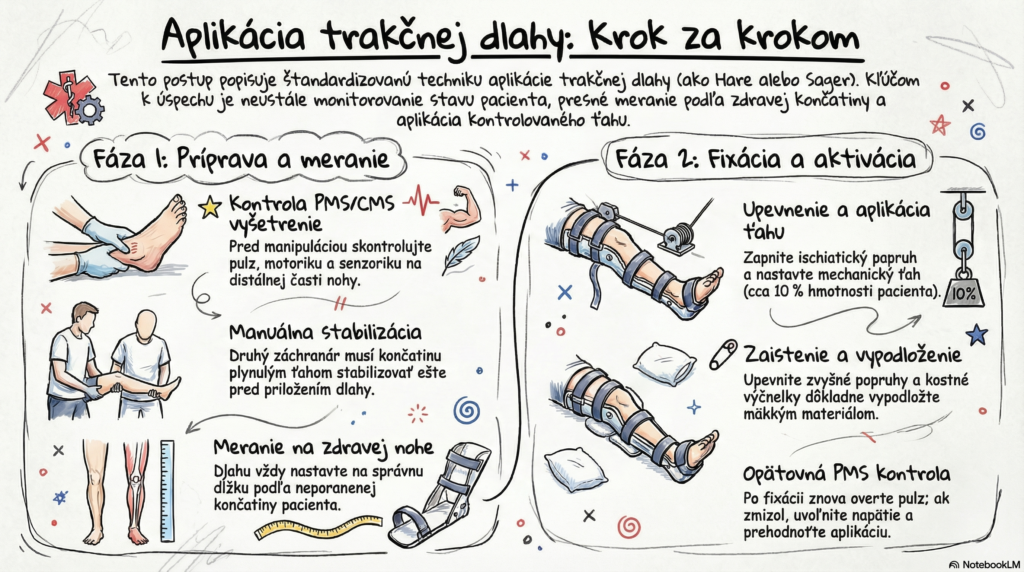
- Preparation and neurovascular assessment: Expose the injured area by cutting away clothing and removing gear. Before any manipulation of the limb, always check pulse, motor function, and sensation (the so-called PMS or CMS assessment) distal to the injury (for example, on the foot).
- Manual traction and stabilization: A second paramedic must manually stabilize the injured limb with a smooth, steady pull before the splint is measured and applied.
- Measuring and adjusting the splint: Place the splint against the patient’s healthy (uninjured) leg and adjust it to the correct length.
- Positioning the splint and the upper strap: Carefully position the splint under the injured leg, or between the patient’s legs, so that the padded upper support (ischial pad) rests securely against the patient’s ischial tuberosity. Then firmly fasten the upper (ischial) strap across the groin and thigh.
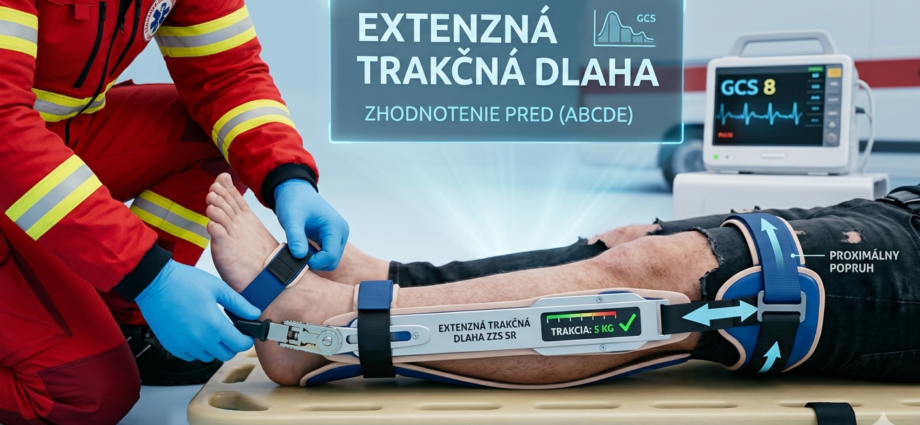
- Applying the ankle harness: Fit the fixation strap (ankle hitch) to the ankle of the injured leg and connect it to the splint’s traction mechanism.
- Applying mechanical traction: Gently and steadily extend the splint mechanism to apply traction. Traction should continue until pain and muscle spasm subside and the injured leg reaches approximately the same length as the healthy one. For devices with a dynamometer (such as the Sager splint), traction is set to approximately 10% of the patient’s body weight.
- Securing the limb with support straps: Once proper traction is achieved, secure the full length of the limb by fastening the remaining support straps around the leg and splint. It is very important to thoroughly pad bony prominences to prevent pressure injuries during transport.
- Repeat check and monitoring: Finally, check the security of the main straps and reassess pulse, motor function, and sensation in the limb. If the distal pulse disappears or worsens after application, tension must be released and splint placement reassessed.
Contraindications:
Pelvic and femoral neck (hip) injuries: An unstable pelvis cannot serve as a safe anchor point for countertraction. In femoral neck (hip) fractures, traction also risks causing rotation and further damage to the blood supply of the femoral head.
Fractures close to a joint: If the fracture is located within 1 to 2 inches (approximately 2.5–5 cm) of the knee or ankle, or if these joints are themselves injured, applying mechanical traction could cause joint dislocation instead of the intended bone stabilization.
Foot and ankle injuries, and multiple fractures of the lower limb: Because traditional traction splints require anchoring at the ankle, any injury in this area makes safe application of the cuff impossible. Traction also fails if the patient has other, concurrent fractures on the same limb.
Partial amputation (avulsion): If bone separation is present and the distal segment (for example, the foot) is held on only by a remaining strip of tissue, applying traction is strictly contraindicated, as it risks complete separation (amputation) of the limb.
Important exception (STS splint): The contraindications above apply to traditional traction splints (such as the Hare or Sager). The innovative Slishman Traction Splint (STS) has no absolute contraindications. Because this splint allows for proximal traction and can be anchored, for example, above the knee, it can be safely used even in patients with concurrent pelvic or hip fractures, ankle or foot injuries, or even distal limb amputation.